Installing WordPress in 3 Easy Ways: from WordPress.com to WordPress on Your Own Server
In our tutorial series, we explained how domain names work and how to register a perfect domain for your blog. Now it’s time to move on to the next step and show you how to install WordPress, a simple but powerful blogging system. This guide will be helpful to any user, from a hardcore geek to a bloggera that just wants to use the best blogging platform and speak (or blog?) their mind:
- WordPress.com;
- Install WordPress with Installatron;
- Install WordPress manually on your own web hosting.
WordPress.com – Hosted, Worry-free Solution
To host a blog, you need a server, which we’ll talk about later in this tutorial. If you don’t have one or you just don’t want to hassle with too much tech stuff, WordPress.com could be the perfect solution for you.
WordPress.com is a hosted blogging solution by Automattic, the crew behind WordPress itself. They’re aware of people who want to focus on blogging only, so they created WordPress.com. Here you can open your blog in a matter of seconds and have everything set up for you. Blog away!
The registration is as simple as it gets. Go to WordPress.com and click the orange Get started here button. Choose a subdomain for your blog and your username, leave an e-mail address and that’s more or less it.
Here’s a short video tutorial explaining the registration process:
Once logged in, you’ll find yourself in the Dashboard, the admin area of every WordPress blog. You will be able to choose a template or start blogging from there. However, blogs on WordPress.com have a slightly smaller number of options than self-hosted solution since they don’t support plugins. But that’s a whole other story 😉 The story of installing WordPress for yourself:
Using Installatron to Install WordPress on Your Server
Today’s prices of hosting are very close to nothing. Options that hosters provide can get you server space for only a few dollars a month. In most cases, you’ll get a set of applications named Installatron with your hosting.
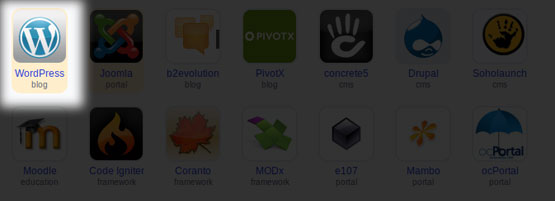
Installatron is a one-click install application with dozens of free and open source web applications waiting just to be installed. The script will set up all the files, folder, databases, users and permissions for you. It will even take care of updates. You just have to choose which web application you need. One of them is WordPress, obviously.
First, you should find the WordPress icon. Click on it and click the Install this application button which will take you to the installation wizard. In the first step, you’ll have to choose a domain and a path where you want your blog to show up. Leave the domain as it is, and if you’d like, change the Path from “wordpress” to “blog” or something like that.
Click the Next and go through the options:
- Choose the newest version;
- Agree with the terms;
- Choose automatic DB settings;
- Enter your desired username, password, blog name and e-mail (which you can change later in the dashboard);
- Click Submit.

Your WordPress will be installed, database set up and you will be taken to the login form. I told you it’s going to be easy…
Manual WordPress Installation – for the Geek You Are
If you ever dismantled a toy as a kid just to learn how it works, you should think about installing the WordPress manually. The logic is simple; upload files, create a database, create a user and grant him permission. Then run the setup. I’ll take you through each step, and if you’ll have any problem, let me know in the comments!
Notice: I’m guessing that you already have some server space and know how to upload files to it via FTP.
1. Prepare Everything
There are a few things you should do on your web server before uploading WordPress’ files. Log into your server dashboard, which will ofter be cPanel or Control Panel or Backstage. If you’re unsure, talk to your hosting company about it. You need to do 2 things here:
- Create a database and;
- Create a user.
You’ll find the option to create a database in the Database section. Enter the name for your database and click Create. Remember the name of DB, since you’ll need it later on.

Creating a user is probably just a tab or option away, as databases and users go hand in hand one with another. Create a user and remember its username and password.

Before moving on, make sure to assign your user to the database. If you look at my screenshot, this shouldn’t be a problem.

This step ensures that user will have read and write permissions on a database.
2. Upload WordPress Files to the Server
To get stared with WordPress, you’ll need to download it at WordPress.org. Extract it from the archive once you donwload it. You should end up with a folder named wordpress on your desktop or wherever your download folder is.
Upload the folder to your server. Feel free to rename “wordpress” to anything you like; blog, site, my-playground… Once uploaded, go to http://yourdomain.com/wordpress and the installation process will start.
3. Install WordPress
If everything went well, you will get a message saying that you need a wp-config.php file, which you won’t have at that moment. In earlier versions of WordPress you would have to manually set up your wp-config, but now there is no need for that. Just click Create a Configuration File.

You will be prompted to enter your database connection details. Remember when you created a database and a user in the first step? Well, this is where you should enter the name of the database and the username and password of the user.
The database host should be localhost in 99.9% of cases, while the table prefix will be important only if you have multiple WordPress installations in one database. Click Submit to test if there is a connection established between WordPress and the database. If there is a connection, click Run the Install.
4. Giving a Name to Your Blog
We know, naming your blog can be as difficult as naming a baby. But it has to be done. Luckily, you can change the Site Title as soon as the installation is finished, right in the Dashboard.
Your username, on the other hand, cannot be changed. You will have the option to choose how your name appears in your posts. Click the Install WordPress.
5. Blog Like There’s no Tomorrow!
Log in with your username and password into your WordPress blog and publish your first post! Really, there are no more steps in the installation process. One thing that you might want to do is to search for a perfect WordPress template.

If you’re having some difficulties with the installation of the WordPress, feel free to ask in the comments or check out WordPress’ even more detailed instructions. Happy blogging!
Title graphic credit: Francis Chouquet